
What is Fermentation? Fermentation is when bacteria chew on and metabolize the natural sugar in veggies or fruits for food and procreation. The byproduct of fermentation is acids, gases, or alcohol and beneficial organisms galore! Other forms of food preservation like freezing and canning deplete prana in the foods making it more tamasic than sattvic. Fermenting creates living nourishment full of prana and extends the life of healthy food.
Fermented products support sour taste in the diet. Sour comes from earth and fire. C and B vitamins, as well as probiotic microorganisms, add essential nutrients to any meal. Too much of any of the six tastes will create imbalance. Just the right amount of sour taste promotes healthy digestion.
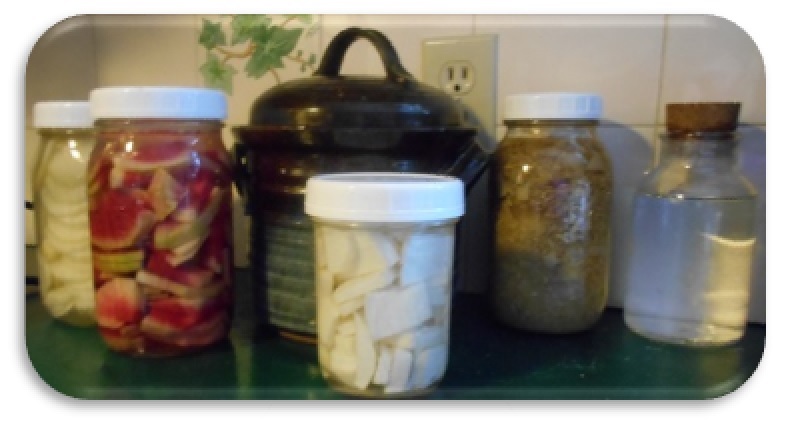
Ferments Have Helped Us A Long Time
People have been fermenting from way back. Fermentation creates beverages that were safe to drink when water from the nearby river could kill you. This process extends the life of milk, eggs, and vegetables while creating delicious nutrient-dense foods. Fermentation has a long history as a go-to tool for food preservation; once fermented vegetables and condiments are root cellar stable for months providing families access to flavor, veggies, and vitamins all winter long. Now foods created by fermentation are all over modern supermarkets, so familiar people don’t even realize.
If you want the benefits of living foods, look in the refrigerator section of the market. Read the package label to be sure there are no preservatives. Here are some probiotic-based living foods I use when I can’t make my own.
Two Types of Home Fermentation
When I started, I was a bit nervous about making ferments at home. So I went to a workshop given by Britney Wood Knickerson whose hands-on approach and clear recipes reassured me. I started using her guidelines. Then I bought a couple of books to explain both wild and cultivated fermentation, and haven’t looked back.
Wild
Wild ferment means add saltwater in the right amount and let nature take its course. The bacteria, yeasts other probiotics organisms that occur naturally on the veggies and in the air, grow. A briny environment promotes the growth of the good guys (probiotics) over the bad guys, aka pathogenic organisms, as well as a delicious taste.
Cultivated
Cultivated fermentation begins by adding a starter to promote the growth of a particular group of organisms in the batch. Kombucha and sourdough bread are two classic examples of using a starter. I have made yogurt, ketchup, mustard, and chutney with a starter.
Starters are cultivation material from the same food, like sourdough for sourdough bread, a kombucha SCOBY for the next batch of kombucha or liquid from sauerkraut to start a new jar. Whey or water kefir go into chutney and other cultivated products.
Sauerkraut can be made as a wild ferment or cultivated by using the liquid from an old batch to seed the bacterial growth for the new recipe

Basic Sauerkraut
Equipment
- 3 wide mouth pint mason jars
- 2 pieces of cheese cloth
- 2 elastic bands
- 2 jar weights
- 1 bowl
- 1 cutting board
- knife, mandolin, or food processor to shread cabbage
- 3 plastic lids
- tape and marker
Ingredients
Brine Solution
- 3 tsp kosher salt
- 1 pint Spring Water
Sauerkraut
- 1 head organic cabbage
- 2 tbsp Kosher salt
- 4 tbsp brine solution Add as necessary to cover cabbage
Instructions
Brine Solution
- Fill a ¾ full pint mason jar with warm water.
- Add 3 tsp kosher salt.
- Mix to dissolve.
- Top off the jar with water cap and label
- Allow the solution to cool to room temperature before use.
- Optional add 1 tbsp of liquid from a previous batch after the salt water is room temperature.
Sauerkraut
- Core then slice cabbage into a bowl in even thin slices
- After each quarter is sliced sprinkle with salt.
- When the cabbage is all sliced and salted, massage until wilted and wet.
- Pack tightly into the jars.
- Press down to squeeze out remaining air. Split any liquid from the bowl between the jars.
- Top off with brine solution to fully cover the vegetables.
- Add the fermentation weight stem up and press down firmly.
- Top to about ¾ of the jar with brine solution.
- Place cheese cloth on top and put an elastic on to hold in place.
- Place on a catch bowl or plate in a temperate space out of direct sunlight.
- Check daily. Remove any floaters and skim any white foam. Add brine starter solution as needed.
- Ferment to taste 7 days and beyond.
- Remove Cheese cloth.
- Cap with plastic cap.
- Label and date with tape and marker.
- Refrigerate and enjoy.
Notes
- Fresh Organic Produce, Plain, Non-Iodized salt, Kosher Salt works great
- Clean Tools Clean is crucial to start your ferment off right. Wash equipment with hot water detergent, then rinse thoroughly before use.
- Wash hands and remove jewelry before vegetable preparation for ferments.
- Don’t Ferment near sprouting or composting can
- Only use untreated or spring water
- When Fermenting, put your fermenting vessel on a plate or in a bowl to catch any overflow
- Sunlight – Keep your fermenting vegetables out of direct sunlight
- Temperature – 65 – 75 F for water temperature and storage temperature works best.
- Time varies based on the size of the vessel, the thickness of the vegetable, recipe, and temperature — time to taste.
- Check your ferment minimum every other day.
- Be sure to keep the liquid level above the solids in pickles and sauerkraut. Remove any errant pieces of solid that float on top of the liquid.
Try Making Your Own Ferments
You can ferment many different things at home in your kitchen, but the easiest way to learn is with cabbage to make sauerkraut or kimchi. All you need for sauerkraut is plain salt, spring water, cabbage, and a fermenting vessel. It is a room-temperature process that is simple to set up. You may want to try making sauerkraut as part of your kitchen sadhana.
Ayurselfcare’s purpose is to educate on the benefits of Ayurveda. This article is not a substitute for professional medical care, treatment, or advice. All the material here is for learning purposes only. Always share strategy and work with your health care team.